
I’ve gotten some questions about How to Make a Copy of a Google Doc/Slide to insert within your Virtual Classroom or other ways you’d like to share/assign a Google Doc/Slide. So I’ve broken it down for you here. There are 3 ways that I am going to teach you, the PDF way and the Publish to the Web way or just a Shareable link.
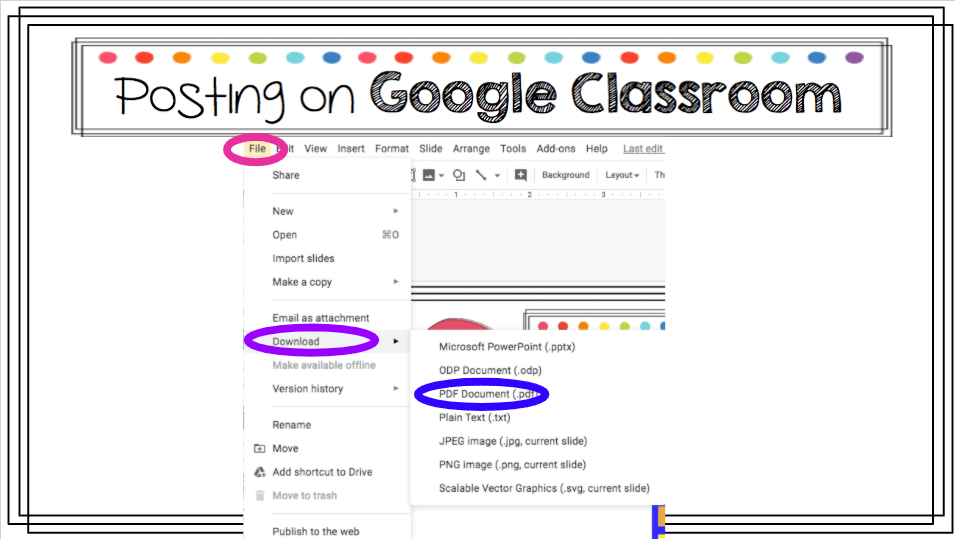
#1. PDF Document: In the Google Doc/Slide you’d like to share, go up to File (pink), click Download (purple) and then PDF Document (blue). This will download a PDF Document to your computer and you can post this where ever you’d like to share it. The links in the PDF will still work and your students/parents/recipients will not be able to move any of the objects you’ve added! The down side is that if you change anything, add anything, delete anything you will need to re-download it, then re-share it with the new PDF.
#2 Publishing to the Web: In the Google Doc/Slide you’d like to share, go up to File (green), click Publish to the Web (yellow), then a screen will pop up to ask if you’d like the Publish (orange).

After clicking Publish (orange – above), another screen will pop up confirming you’d like to Publish, click OK (pink). Then you will copy the link (purple) and you can share that link directly with your students/parents/recipients. The GREAT part about share something this way is that any changes you make to your Google Doc/Slide will be AUTOMATICALLY updated on their end without having to re-download or re-share! So if you’re like me and you like to change things often (or find something super cool last minute that you still want to share….), this is a great option!!

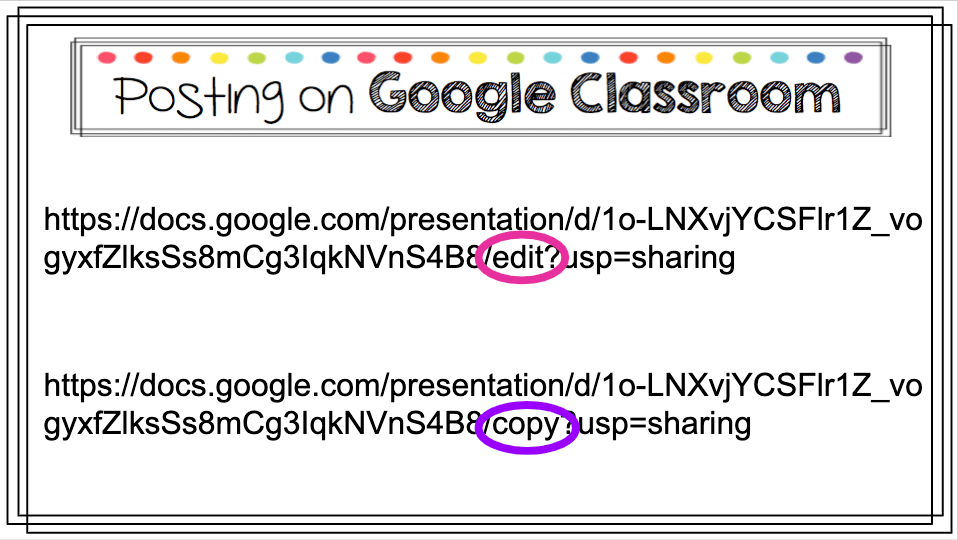
If you’d like to just share the Google Doc/Slide link with your students/parents/recipients you can always go to the top right corner of the screen, click the yellow SHARE button, make sure you change the settings so that Everyone with the Link can Edit. Then copy that Share Link, BUT DON’T SEND IT YET! Otherwise they are going to have access to change your MASTER copy! Before you share that link you are going to find the word Edit (pink) within your link, and change it to the word Copy (purple). After you change that wording, you can share the NEW link. This new link will prompt anyone receiving it to AUTOMATICALLY make a copy and will NOT affect your Original/Master Google Doc/Slide.
I hope this helps!! I use this last method when adding Google Doc/Slide Assignments for my students within my Bitmoji Virtual Classrooms!
If you have any questions or tips please leave a comment below! Thanks!
