
Sooo…. you’re thinking about your teaching schedule and wondering how you are going to fit everything in… AND make everyone feel successful?! No problem, I’ll share with you what my typical day looks like the first 2 weeks of school (minus the 1st day, we always just do 1st day things… I’ll touch on that in another post).
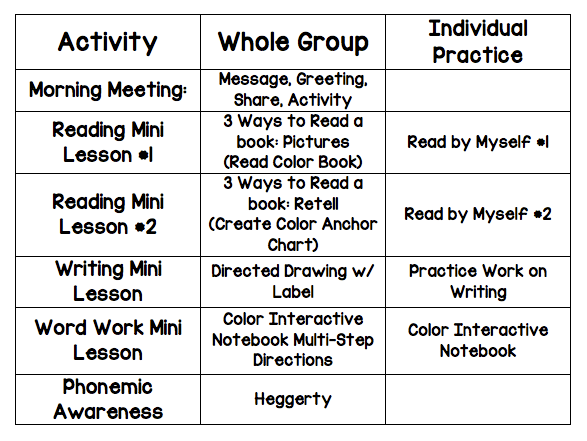
Quick ELA Schedule Break Down (then you’ll get the detailed ELA schedule below):
Day 2:
I start my day greeting each student at the doorway, typically (not this year – coming up with social distance greetings, coming soon) giving each a handshake and a “Good morning (insert name here).” and I have them respond back to me with a “Good morning Ms. Friedl”.
When they enter the classroom they need to find their name tag/spot that they are assigned to sit for the day. I have placed their nameplates around the room at a different seat option then they had the day before.
We gather on the rug for a Morning Meeting. On the board I have written:

After we read the message together, I ask 2 questions. #1: What are we doing today? #2: Who are the super stars? After each question, I will call on students to help tell me the answers, then I will find the answer they said inside the letter and underline it (Ask and answer questions to demonstrate understanding of a text, referring explicitly to the text as the basis for the answers. – a 3rd grade standard). This is getting my students to focus back on the text, always having to “prove” their answer, paying close attention to the details within the text to find their answers!
After our morning message we move to the outside of the carpet and we do a greeting (we pass the handshake around the circle, saying Good Morning and their name, if they don’t remember the students name, they are remind that they can just ask them!) Then we do a share on day 2 – we share how old we are. We are practicing saying things in a sentence – so I model, and we all basically say the same sentence. Then we usually do a silly partner activity called: A-Moose-Ta-Cha from GoNoodle. We use our Pinkies to link with another person’s Pinky and they are called our Pinky Linker. Then we turn and face our Pinky Partner and play this super silly song. I make sure I do it too and that I’m EXTRA silly, so that students feel comfortable enough to be silly too! Once our silly song is over, we say goodbye to our Pinky Linkers and head back to our spot on the rug.
Then I introduce the 3 ways to read a book – and we focus on the 1st way: Read the Pictures. We practice all together by reading the Red book:
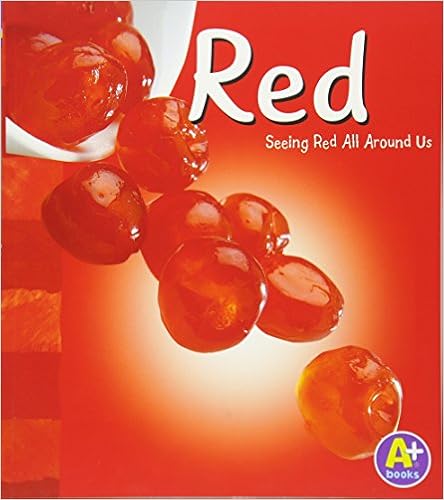
I really LOVE this series of books (they have them in all 11 colors that I introduce) because they have GREAT real life pictures of things that are that color! It gives the students a LOT to talk about and point out while reading the pictures.
Then we go practice reading the pictures with our book boxes (at the beginning of the year, I have placed 5 picture books in their book boxes for them – 3 ABC books and 2 Color Books. I rotate books each day, so they have 5 new books to help sustain their reading. Students will be able to pick their own books in a few weeks). We usually read for about 2 or so minutes, depending on student engagement.
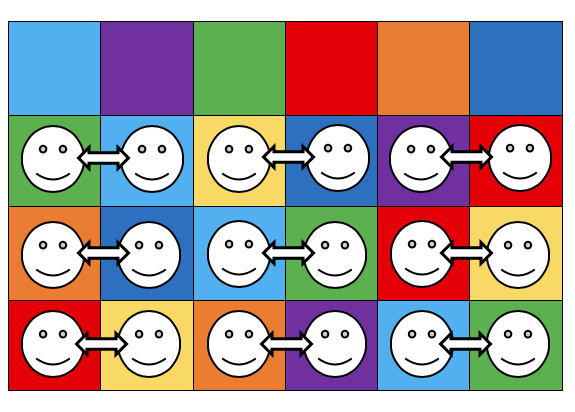
Then I say 1-2-3 Freeze. And have students leave their book boxes in their spaces, then come back to the rug for a short GoNoodle. We talk about another way to read books: Retelling. We review things (from our story) that could be Red, first by thinking to ourselves (put your finger on your brain so I know you’re thinking… works every time, especially when you do it and say hmmm…), then we turn and talk to a designated child (see picture below on how we turn and talk on my rug).
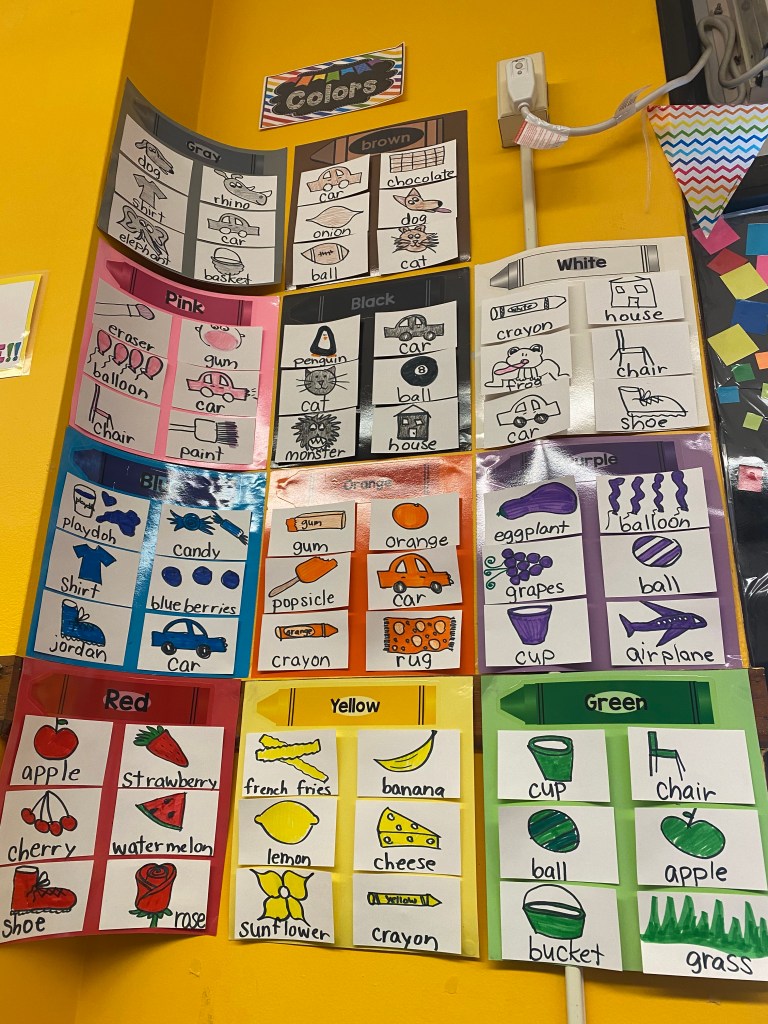
and finally I “pick sticks” or choose “random” on ClassDojo to help select a few random students to share out their ideas. Then I add their ideas onto our Colors Anchor Charts. Below is a picture of all of our Color Anchor Charts from this past year. I do my best to draw the image they suggest, and then write the word underneath it, as an example of labels. I do ask students to help me think about the beginning sound of the word when I write it. You will see some repeat pictures… I was fine with that, but you can do all new words for each color, its up to you! My class was obsessed with cars, and shoes… I made it work!
After we made the charts together, we quickly went over expectations on how to read by myself (again), I let students take a turn telling me how to do that. Then we went to our book boxes and practiced again, setting a goal to read longer this time so we can ‘get smarter’ (which is always our goal in my classroom!).

After we practice reading the 2nd time, I will say 1-2-3 Freeze (it’s my favorite at the beginning of the year because its easy) and then we clean up our book boxes, I call numbers to come practice putting book boxes away where they belong. Then they gather on the rug to do another GoNoodle.
Then we go into our Work on Writing Lesson. Check out my post that gives tons of detail here. This is SUCH an important part to learning how to read, I highly recommend it!
After the students go off and try it by themselves, I go around and stamp their papers. When I come around to their papers I expect a few things: #1 their names written on the paper (I write their names in Yellow marker/crayon at the top of their paper if they need assistance with name writing) #2 their picture needs to be drawn #3 their label needs to be written & they need to be able to “read” it. On the example below, Jakyla is working on drawing blueberries and traced the word: blue at the bottom of her paper.

SO when I come around I quickly check for those things, then I ask the student to read their labels. If they have all those things, I stamp their papers, then they put their papers up near Jiji (our Penguin friend) and join us on the rug for a GoNoodle.
The next Mini Lesson I give is our Word Work: Color Interactive Notebook Pages. If you’d like to purchase them you can find them on TPT here: Color Interactive notebook pages. I will warn you… this is a loooong lesson at first that is cut up into SEVERAL steps. (I’ll be writing a detailed post on how I do this…. so check back if you want that info!)
Between each part of the lesson, students go off and try that part on their own before returning to the rug for another snippet and again trying it on their own. The key is that you are building up their ability for multi-step directions! This is also a GREAT opportunity to let students take the lead on being the teacher and teaching us all how to do each part (of course this is after they’ve seen you model it several times!).
Finally when our Color Interactive Notebook pages are completed, we’ve done our GoNoodle to help with a movement break, we are ready for the final part of our ELA time: Heggerty! If you haven’t heard of, or seen a Heggerty lesson, they are GREAT! I used this program very early in career and I LOVE how it progresses, getting a little bit more complex each week, etc. At the beginning of the year, I start off really slowly – because lets be honest… even 10 minutes of quick interactive (hand movements and repeating) is HARD for little ones. So I usually do about 3 of the activities and that’s it. Then I’ll increase by adding another section when they are ready.
At the end of the day (right before play time) I do my Mini Lesson with our Color Hats. If you’d like to purchase them you can find them on TPT here: Color Hats. Because I’ve used the Color Interactive Notebooks earlier in the day, I have my kiddos think of 4 things they know that are the focus color, and then draw them in the boxes. If you’d like to see the whole break down of the Color Hats, check out my post here.


I hope this helps you understand what the beginning of K looks like in my classroom. There really isn’t a LOT to do, but it all takes a LONG time, because we are practicing, and re-practicing and guess what… practicing some more! It’s all about setting your kiddos up for success!!
If you’re interested in purchase BOTH the Color Interactive Notebook pages and the Color Hats you can find the Bundle here.
Please ask questions, or leave comments below! Thanks!!!
